Should Charts and Graphs Be Uploaded in the Text or at the End
If Excel is installed on your figurer, you lot can take reward of the advanced charting capabilities in Word.
What do you want to do?
-
Learn about charts
-
Step 1: Create a basic chart
-
Insert a chart by embedding it into your certificate
-
Paste a linked Excel chart into your certificate
-
Adjust the Excel worksheet information
-
-
Step ii: Modify the layout or manner of a chart
-
Apply a predefined nautical chart layout
-
Employ a predefined chart style
-
Alter the format of chart elements manually
-
-
Step 3: Add or remove titles or information labels
-
Add a chart title
-
Add axis titles
-
Add information labels
-
-
Step 4: Show or hibernate a legend
-
Step five: Display or hide primary chart axes or gridlines
-
Step six: Move or resize a chart
-
Move a chart
-
Resize a chart
-
-
Step 7: Salvage a chart every bit a template
Larn about charts
Charts are used to display serial of numeric data in a graphical format to make information technology easier to understand large quantities of data and the relationship betwixt different series of data.
1. Worksheet information
two. Nautical chart created from worksheet information
Excel supports many types of charts to help you brandish data in means that are meaningful to your audition. When you create a chart or alter an existing chart, y'all tin can select from a variety of nautical chart types (such equally a column chart or a pie chart) and their subtypes (such equally a stacked column chart or a pie in 3-D chart). You lot tin also create a combination chart past using more i nautical chart blazon in your nautical chart.
For more than data nigh the nautical chart types that yous can select in Excel, come across Available chart types.
Getting to know the elements of a nautical chart
A chart has many elements. Some of these elements are displayed by default, others tin be added as needed. Y'all can change the brandish of the nautical chart elements by moving them to other locations in the chart, resizing them, or by changing the format. You lot tin can too remove chart elements that you practise not want to display.
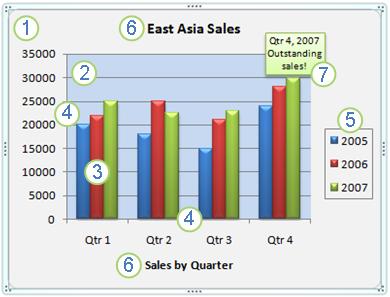
one. The chart area of the chart.
ii. The plot area of the chart.
3. The data points of the information series that are plotted in the chart.
4. The horizontal (category) and vertical (value) axis forth which the data is plotted in the chart.
5. The legend of the nautical chart.
6. A nautical chart and centrality title that you can employ in the chart.
vii. A data label that you can use to identify the details of a information point in a data series.
Modifying a basic chart to see your needs
Later you create a chart, you tin can change any ane of its elements. For case, yous might desire to change the manner that axes are displayed, add a nautical chart championship, move or hibernate the legend, or display additional chart elements.
To modify a chart, you can:
-
Change the display of chart axes You lot can specify the scale of axes and adjust the interval between the values or categories that are displayed. To make your nautical chart easier to read, you can also add together tick marks to an axis, and specify the interval at which they will appear.
-
Add together titles and data labels to a chart To help clarify the information that appears in your chart, you lot tin add a chart title, axis titles, and information labels.
-
Add together a legend or data tabular array You can evidence or hide a legend, alter its location, or change the fable entries. In some charts, you tin can as well bear witness a data table that displays the legend keys and the values that are presented in the chart.
-
Apply special options for each chart type Special lines (such as high-low lines and trendlines), bars (such every bit up-downward bars and error bars), information markers, and other options are available for dissimilar chart types.
Applying a predefined nautical chart layout and chart fashion for a professional await
Instead of manually calculation or changing chart elements or formatting the nautical chart, you can speedily employ a predefined chart layout and nautical chart style to your nautical chart. Word provides a multifariousness of useful predefined layouts and styles that you lot can select, simply you lot can fine-tune a layout or style if it is needed by making manual changes to the layout and format of individual chart elements, such as the chart area, plot area, data series, or fable of the chart.
When you apply a predefined chart layout, a specific fix of chart elements (such as titles, a legend, a data table, or data labels) are displayed in a specific arrangement in your nautical chart. You tin select from a variety of layouts that are provided for each chart type.
When you apply a predefined chart manner, the chart is formatted based on the document theme that you have applied, so that your chart matches your organisation'southward or your own theme colors (a ready of colors), theme fonts (a set of heading and body text fonts), and theme effects (a prepare of lines and fill effects).
Yous cannot create your own chart layouts or styles, just y'all can create chart templates that include the chart layout and formatting that you want.
Adding heart-communicable formatting to a chart
In improver to applying a predefined chart way, you can easily utilize formatting to private chart elements such every bit data markers, the chart area, the plot area, and the numbers and text in titles and labels to give your chart a custom, eye-catching wait. You lot can employ specific shape styles and WordArt styles, and you can also format the shapes and text of chart elements manually.
To add together formatting, you can:
-
Fill up chart elements You can use colors, textures, pictures, and slope fills to help depict attending to specific chart elements.
-
Change the outline of chart elements You can utilise colors, line styles, and line weights to emphasize chart elements.
-
Add special furnishings to nautical chart elements You tin can use special effects, such every bit shadow, reflection, glow, soft edges, bevel, and iii-D rotation to chart element shapes, which gives your chart a finished await.
-
Format text and numbers You can format text and numbers in titles, labels, and text boxes on a chart as you would text and numbers on a worksheet. To make text and numbers stand out, you tin even apply WordArt styles.
Reusing charts by creating chart templates
If yous want to reuse a nautical chart that you lot customized to meet your needs, you lot can save that chart every bit a chart template (*.crtx) in the nautical chart templates folder. When yous create a chart, you can then apply the nautical chart template but equally you would any other built-in nautical chart type. In fact, chart templates are custom chart types — you tin can besides use them to modify the chart type of an existing chart. If you use a specific nautical chart template ofttimes, you tin relieve it as the default chart type.
Tiptop of Page
Step 1: Create a bones chart
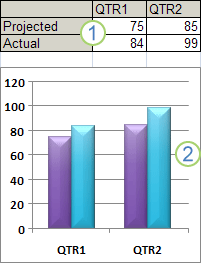
You tin can add a chart to your Word document in one of two ways: insert a chart by embedding it into your Word document, or paste an Excel chart into your Word document that is linked to data in an Role Excel 2007 worksheet. The chief differences betwixt embedded charts and linked charts are where the data is stored and how you update the information after you lot place it in the Word document.
Note:Some chart types require a specific information arrangement in the Excel worksheet. For more data, meet Arrange the Excel worksheet information.
Insert a nautical chart past embedding it in your document
When y'all embed an Excel chart, information in the Word file doesn't change if you modify the source Excel file. Embedded objects become part of the Word file and, after they are inserted, they are no longer part of the source file.
Considering the information is totally contained in one Word document, embedding is useful when yous don't desire the information to reflect changes in the source file, or when you don't want the document recipients to be concerned with updating the linked information.
-
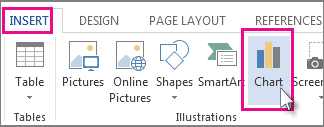
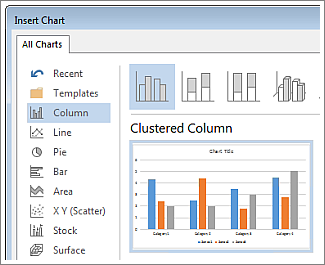
In your Word document, click Insert > Chart.
-
Select the type of nautical chart you want, such as cavalcade or pie chart, and click OK. (If you're not sure which to choose, move down the All Charts list to preview each type.)
-
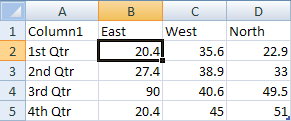
Enter your data into the spreadsheet that automatically opens with the chart. The chart will update to match the data after you finish typing data into one cell and move to the next.
Important: Part 2010 is no longer supported. Upgrade to Microsoft 365 to work anywhere from any device and continue to receive support.
Upgrade now
-
In Give-and-take, click where you lot want to insert the chart.
-
On the Insert tab, in the Illustrations group, click Chart.
-
In the Insert Chart dialog box, click a chart, and then click OK.
-
Enter your data into the spreadsheet that automatically opens with the chart. The chart will update to friction match the data later on you terminate typing data into one jail cell and movement to the next.
Important: Part 2007 is no longer supported. Upgrade to Microsoft 365 to work anywhere from whatever device and continue to receive back up.
Upgrade now
-
In Word, click where y'all desire to insert the nautical chart.
-
On the Insert tab, in the Illustrations group, click Nautical chart.
-
In the Insert Chart dialog box, click a nautical chart, and then click OK.
Office Excel 2007 opens in a separate window and displays sample data on a worksheet.
-
In the Excel window, supersede the sample data by clicking a cell on the worksheet and then typing the data that you want.
You tin also supersede the sample centrality labels in Cavalcade A and the fable entry name in Row 1.
Annotation:Later on you update the worksheet, the nautical chart in Word will be updated automatically with the new data.
-
In Excel, click the Microsoft Office Button
 , then click Salve As.
 -
In the Salvage As dialog box, in the Save in listing, select the folder or drive that you want to relieve the worksheet to.
To save the worksheet to a new binder, click Create New Folder
 .
. -
In the File name box, type a new proper name for the file.
-
Click Salvage.
-
In Excel, click the Microsoft Part Push button
, and so click Close.
Top of Page
Paste a linked Excel chart into your document
You tin create and copy a chart in an external Excel 2007 worksheet, and paste a linked version of the nautical chart into your Word document. When a chart is linked, information can be updated if the external Excel worksheet is modified. Linked information is stored in the Excel worksheet. The Word certificate stores merely the location of the source file, and it displays a representation of the linked data.
Linking is also useful when you want to include information that is maintained independently, such as information nerveless by a dissimilar department, and when yous need to go on that data upwards-to-date in a Word document. For more information about creating charts in Excel, come across Create a chart.
-
In Excel, select the chart past clicking its border, and then on the Habitation tab, in the Clipboard grouping, click Cut.
The chart is removed, but the information remains in Excel.
-
In Discussion, click where you want to insert the nautical chart in the document.
-
On the Home tab, in the Clipboard group, click Paste.
The Paste Options button indicates that the nautical chart is linked to data in Excel.
-
Save the Word document with the chart that you lot linked to information in Excel.
When you reopen the Word certificate, click Yes to update the Excel data.
Yous can too create visual representations of information by using SmartArt graphics. For more data, come across Create a SmartArt graphic.
Superlative of Page
Arrange the Excel worksheet data
For most charts, such as cavalcade and bar charts, you can plot the data that y'all arrange in rows or columns on a worksheet into a chart. However, some chart types (such as pie and chimera charts) require a specific data arrangement.
-
On the worksheet, arrange the data that you lot desire to plot in a nautical chart.
The data can be arranged in rows or columns — Excel automatically determines the best fashion to plot the information in the chart. Some chart types (such as pie and bubble charts) require a specific data system as described in the following table.
For this chart type
Arrange the data
Column, bar, line, expanse, surface, or radar nautical chart
In columns or rows, such as:
Lorem
Ipsum
1
2
iii
4
Or:
Lorem
1
3
Ipsum
2
4
Pie or doughnut nautical chart
For one data series, in one cavalcade or row of data and i cavalcade or row of data labels, such as:
A
ane
B
two
C
3
Or:
A
B
C
1
2
iii
For multiple data series, in multiple columns or rows of data and ane column or row of data labels, such equally:
A
i
2
B
3
4
C
v
6
Or:
A
B
C
one
2
three
4
5
6
XY (scatter) or bubble nautical chart
In columns, placing x values in the first cavalcade and corresponding y values and bubble size values in adjacent columns, similar:
X
Y
Chimera size
1
ii
iii
4
5
6
Stock chart
In columns or rows in the following order, using names or dates as labels:
high values, low values, and endmost values
Similar:
Date
Loftier
Low
Shut
ane/ane/2002
46.125
42
44.063
Or:
Date
1/i/2002
High
46.125
Depression
42
Close
44.063
-
Select the cells that contain the data that you want to utilize for the nautical chart.
Tip:If you select simply one cell, Excel automatically plots all cells that contain information that is next to that cell into a nautical chart. If the cells that you want to plot in a chart are not in a continuous range, you can select nonadjacent cells or ranges as long as the selection forms a rectangle. You can also hide the rows or columns that you do non want to plot in the chart.
How to select cells, ranges, rows, or columns
To select
Do this
A single prison cell
Click the cell, or press the arrow keys to motility to the cell.
A range of cells
Click the starting time cell in the range, and then drag to the terminal prison cell, or concord downwards SHIFT while you press the pointer keys to extend the selection.
You can also select the kickoff cell in the range, then press F8 to extend the choice by using the arrow keys. To finish extending the pick, printing F8 once again.
A large range of cells
Click the first cell in the range, and and so hold downward SHIFT while you click the last prison cell in the range. You tin can scroll to make the last cell visible.
All cells on a worksheet
Click the Select All button.

To select the entire worksheet, you tin can besides press CTRL+A.
If the worksheet contains data, CTRL+A selects the current region. Pressing CTRL+A a second time selects the unabridged worksheet.
Nonadjacent cells or jail cell ranges
Select the showtime jail cell or range of cells, and then hold down CTRL while yous select the other cells or ranges.
You tin also select the first cell or range of cells, and then press SHIFT+F8 to add together another nonadjacent cell or range to the selection. To stop adding cells or ranges to the pick, press SHIFT+F8 over again.
Notation:Y'all cannot abolish the option of a cell or range of cells in a nonadjacent selection without canceling the entire selection.
An entire row or column
Click the row or column heading.
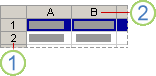
1. Row heading
2. Cavalcade heading
You tin besides select cells in a row or column past selecting the first cell and then pressing CTRL+SHIFT+ARROW primal (Correct Pointer or LEFT ARROW for rows, UP Arrow or DOWN ARROW for columns).
If the row or cavalcade contains data, CTRL+SHIFT+Pointer key selects the row or column to the last used cell. Pressing CTRL+SHIFT+ARROW key a second fourth dimension selects the entire row or column.
Next rows or columns
Drag across the row or column headings. Or select the kickoff row or column; then hold downwards SHIFT while you select the concluding row or column.
Nonadjacent rows or columns
Click the cavalcade or row heading of the first row or column in your selection; then hold down CTRL while you lot click the column or row headings of other rows or columns that you desire to add together to the pick.
The first or last jail cell in a row or cavalcade
Select a cell in the row or column, and and so printing CTRL+ARROW fundamental (RIGHT Pointer or LEFT ARROW for rows, UP ARROW or DOWN Arrow for columns).
The first or final cell on a worksheet or in a Microsoft Part Excel table
Printing CTRL+Dwelling to select the start cell on the worksheet or in an Excel list.
Press CTRL+END to select the last cell on the worksheet or in an Excel list that contains data or formatting.
Cells to the last used cell on the worksheet (lower-right corner)
Select the first cell, and so press CTRL+SHIFT+Stop to extend the selection of cells to the last used prison cell on the worksheet (lower-correct corner).
Cells to the starting time of the worksheet
Select the first jail cell, and then press CTRL+SHIFT+Dwelling house to extend the selection of cells to the beginning of the worksheet.
More than or fewer cells than the active choice
Hold downwards SHIFT while y'all click the final prison cell that you desire to include in the new choice. The rectangular range between the active cell and the cell that you click becomes the new option.
To abolish a selection of cells, click any cell on the worksheet.
-
On the Insert tab, in the Charts group, do one of the following:
-
Click the chart type, and and then click a nautical chart subtype that you lot desire to employ.
-
To see all available nautical chart types, click a chart type, and so click All Nautical chart Types or the More menu item to brandish the Insert Chart dialog box, click the arrows to ringlet through all available nautical chart types and nautical chart subtypes, and then click the ones that you desire to use.
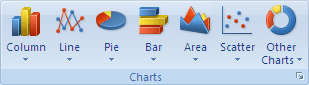
A ScreenTip displays the chart type name when you rest the mouse arrow over any chart type or chart subtype. For more information almost the chart types that you tin use, see Bachelor chart types.
-
-
Past default, the nautical chart is placed on the worksheet as an embedded chart. If you want to place the nautical chart in a split up chart canvas, you can change its location past doing the following:
-
Click the embedded chart to select it.
This displays the Chart Tools tab.
-
On the Design tab, in the Location group, click Move Chart.

-
Under Choose where you desire the nautical chart to be placed, do one of the following:
-
To display the chart in a chart sail, click New canvass.
If you want to replace the suggested name for the nautical chart, y'all can type a new name in the New sheet box.
-
To display the chart as an embedded chart in a worksheet, click Object in, and so click a worksheet in the Object in box.
-
-
-
To quickly create a chart that is based on the default chart type, select the data that y'all want to use for the nautical chart, and so printing ALT+F1. When you press ALT+F1, the nautical chart is displayed as an embedded chart.
-
When you create a chart, Excel determines the orientation of the data series based on the nnumber of worksheet rows and columns that are included in the nautical chart. After you create a nautical chart, y'all can change the style that worksheet rows and columns are plotted in the chart by switching rows to columns or vice versa.
-
If you no longer need a chart, you can delete it. Click the chart to select it, and then press DELETE.
Top of Page
Footstep 2: Change the layout or style of a chart
Afterwards you create a chart, you tin instantly change its expect. Instead of manually calculation or irresolute chart elements or formatting the chart, you can chop-chop apply a predefined layout and way to your nautical chart. Word provides a variety of useful predefined layouts and styles (or quick layouts and quick styles) that you tin select from, but you can customize a layout or way every bit needed by manually changing the layout and format of individual chart elements.
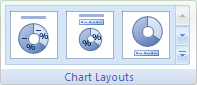
Apply a predefined nautical chart layout
-
Click the chart that you want to format by using a predefined chart layout.
This displays the Chart Tools tab, adding the Blueprint and Format tabs.
-
On the Blueprint tab, in the Nautical chart Layouts grouping, click Quick Layout, and then click the nautical chart layout that you want to use.
To come across all available layouts, click More
 .
.
Top of Page
-
Click the chart that you want to format by using a predefined chart layout.
This displays the Nautical chart Tools, adding the Design, Layout, and Format tabs.
-
On the Design tab, in the Chart Layouts grouping, click the chart layout that you want to utilise.
Top of Page
Employ a predefined chart style
-
Click the chart that you want to format by using a predefined chart way.
This displays the Chart Tools, adding the Design and Format tabs.
-
On the Design tab, in the Chart Styles group, click the chart style that you want to use.

To see all predefined chart styles, click More
.
Top of Folio
-
Click the chart that you desire to format past using a predefined nautical chart style.
This displays the Chart Tools, calculation the Design, Layout, and Format tabs.
-
On the Design tab, in the Chart Styles group, click the chart fashion that you want to use.
Note:When the size of the Excel window is reduced, chart styles will be bachelor in the Quick Styles gallery in the Chart Styles grouping.
To see all predefined chart styles, click More than
.
Acme of Folio
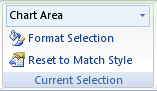
Change the format of chart elements manually
-
Click the chart or the nautical chart element for which you desire to change the fashion, or do the following to select a chart element from a list of chart elements.
-
Click a chart to display the Chart Tools.
-
On the Format tab, in the Current Option group, click the arrow next to the Nautical chart Elements box, and then click the chart element that you desire.
-
-
On the Format tab, practice any of the following:
-
To format whatsoever selected nautical chart element, in the Current Selection group, click Format Option, then select the formatting options that you want.
-
To format the shape of a selected chart element, in the Shape Styles group, click the way that you want, or click Shape Fill, Shape Outline, or Shape Effects, and so select the formatting options that yous want.
-
To format the text in a selected nautical chart element past using WordArt, in the WordArt Styles group, click the style that you want, or click Text Fill, Text Outline, or Text Effects, and and then select the formatting options that you desire.
Note:After yous apply a WordArt style, you cannot remove the WordArt format. If y'all do not desire the WordArt manner that you applied, you tin can select another WordArt manner, or you can click Undo on the Quick Access Toolbar to return to the previous text format.
Tip:To utilize regular text formatting to format the text in chart elements, you can right-click or select the text, and then click the formatting options that yous want on the Mini toolbar. You tin can also utilize the formatting buttons on the Ribbon (Home tab, Font group).
-
Acme of Page
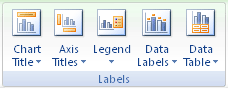
Pace three: Add or remove titles or data labels
To brand a chart easier to understand, you tin can add titles, such equally a chart title and axis titles. Axis titles are typically available for all axes that can exist displayed in a chart, including depth (series) axes in 3-D charts. Some nautical chart types (such every bit radar charts) have axes, just they cannot display axis titles. Chart types that do non accept axes (such equally pie and doughnut charts) cannot display axis titles either.
You tin also link chart and axis titles to respective text in worksheet cells past creating a reference to those cells. Linked titles are automatically updated in the nautical chart when you lot alter the corresponding text on the worksheet.
To chop-chop identify a data series in a chart, you tin can add data labels to the data points of the chart. Past default, the data labels are linked to values on the worksheet, and they update automatically when changes are made to these values.
Add a nautical chart title
-
Click the chart to which you want to add a title, and then click the Chart Elements
 push button.
 -
In the Chart Elements list that appears, select Chart Title.
-
In the Nautical chart Title text box that appears in the chart, type the text that you want.
To insert a line break, click to identify the pointer where you want to intermission the line, and so press ENTER.
-
To format the text, select it, and then click the formatting options that yous want on the Mini toolbar.
Top of Page
-
Click the chart to which you want to add a championship.
This displays the Chart Tools, adding the Design, Layout, and Format tabs.
-
On the Layout tab, in the Labels grouping, click Chart Title.
-
Click Centered Overlay Title or Above Chart.
-
In the Nautical chart Championship text box that appears in the chart, type the text that you want.
To insert a line intermission, click to place the arrow where yous want to break the line, and then press ENTER.
-
To format the text, select it, and then click the formatting options that you lot want on the Mini toolbar.
You can also employ the formatting buttons on the Ribbon (Home tab, Font group). To format the whole championship, you lot tin can right-click information technology, click Format Chart Championship, and then select the formatting options that y'all want.
Height of Page
Add centrality titles
-
Click the nautical chart to which you desire to add axis titles, and so click the Chart Elements
button. -
In the Chart Elements list that appears, select Axis Titles.
-
Select the axis titles that are added to your chart and type the text that you lot want.
-
To format the text, select it, so click the formatting options that you want on the Mini toolbar.
Height of Page
-
Click the nautical chart to which yous want to add centrality titles.
This displays the Nautical chart Tools, calculation the Design, Layout, and Format tabs.
-
On the Layout tab, in the Labels group, click Axis Titles.
-
Do whatever of the following:
-
To add a championship to a primary horizontal (category) centrality, click Main Horizontal Axis Title, and and so click the option that you want.
If the chart has a secondary horizontal axis, y'all can also click Secondary Horizontal Axis Title.
-
To add together a title to chief vertical (value) axis, click Primary Vertical Axis Title, and and then click the choice that you want.
If the chart has a secondary vertical axis, you can too click Secondary Vertical Centrality Title.
-
To add a title to a depth (serial) centrality, click Depth Centrality Title, and then click the choice that you want.
Annotation:This option is only available when the selected chart is a true 3-D chart, such every bit a 3-D column chart.
-
-
In the Axis Championship text box that appears in the chart, blazon the text that you want.
To insert a line break, click to place the pointer where you desire to break the line, and then printing ENTER.
-
To format the text, select it, and then click the formatting options that you desire on the Mini toolbar.
You can also employ the formatting buttons on the Ribbon (Home tab, Font group). To format the whole championship, you can right-click it, click Format Axis Title , and then select the formatting options that yous want.
Notes:
-
If y'all switch to some other nautical chart type that does non back up axis titles (such as a pie chart), the axis titles will no longer exist displayed. The titles will be displayed over again when you switch back to a nautical chart type that does support axis titles.
-
Axis titles that are displayed for secondary axes volition be lost when you switch to a chart type that does not brandish secondary axes.
-
Top of Page
Add data labels
-
Click the nautical chart to which you want to add together data labels, and and then click the Chart Elements
push button. -
In the Chart Elements list that appears, select Data Labels.
-
Select the data labels that are added to your chart and blazon the text that you lot want.
Notation:Depending on the nautical chart type that you used, unlike data label options will exist available.
For more information about how to change data label entries or how to reposition data labels, see Add or remove data labels in a chart.
Tiptop of Page
-
On a chart, practise one of the following:
-
To add a data label to all data points of all data serial, click the chart area.
-
To add a data label to all information points of a information series, click anywhere in the data series that you want to label.
-
To add a data label to a single data point in a information serial, click the data series that contains the data point that you want to label, and and so click the data point that yous want to label.
This displays the Chart Tools, calculation the Design, Layout, and Format tabs.
-
-
On the Layout tab, in the Labels group, click Data Labels, and then click the display selection that you lot want.
Annotation:Depending on the chart blazon that you lot used, different data label options will be available.
For more than information about how to change data characterization entries or how to reposition data labels, run across Add or remove data labels in a chart.
Top of Folio
Step 4: Prove or hide a legend
When you create a nautical chart, the fable appears, merely you can hide the fable or change its location after you create the chart.
-
Click the nautical chart in which you desire to show or hide the legend, and so click the Nautical chart Elements
button. -
In the Chart Elements list that appears, select or clear Fable.
When a chart has a legend displayed, yous can modify the individual legend entries. For more than information, see Change nautical chart legend entries.
Superlative of Page
-
Click the chart in which you want to show or hide a legend.
This displays the Nautical chart Tools, adding the Design, Layout, and Format tabs.
-
On the Layout tab, in the Labels grouping, click Legend.
-
Do one of the following:
-
To hide the legend, click None.
To quickly remove a legend or a legend entry from a chart, y'all can select it, and so press DELETE. You can likewise right-click the fable or a fable entry, and then click Delete.
-
To display a fable, click the brandish choice that y'all want.
Note:When you click one of the brandish options, the legend moves, and the plot area automatically adjusts to make room for it. If you move and size the legend past using the mouse, the plot expanse does not automatically accommodate.
-
For additional options, click More than Legend Options, and then select the display option that you desire.
Tip:By default, a legend does not overlap the nautical chart. If you lot take infinite constraints, you might be able to reduce the size of the nautical chart by clearing the Show the legend without overlapping the nautical chart cheque box.
-
When a chart has a legend displayed, y'all tin can modify the private legend entries. For more data, see Change chart legend entries.
Summit of Page
Step 5: Display or hide primary nautical chart axes or gridlines
When you create a nautical chart, principal axes are displayed for most nautical chart types. Y'all tin plow them on or off every bit needed. When you add axes, you can specify the level of detail that you want the axes to display. A depth axis is displayed when you lot create a 3-D nautical chart.
To make a chart easier to read, you lot can brandish or hibernate the horizontal and vertical chart gridlines that extend from any horizontal and vertical axes across the plot area of the chart.
-
Click the nautical chart in which you want to display or hibernate axes or gridlines, and then click the Chart Elements
button. -
In the Chart Elements listing that appears, select or articulate Axes or Gridlines.
Acme of Folio
-
Click the chart for which you lot want to display or hide axes or gridlines.
This displays the Chart Tools, calculation the Design, Layout, and Format tabs.
-
On the Layout tab, in the Axes group, click Axes or Gridlines, and and so select the option you want.
Top of Page
Step 6: Motion or resize a chart
You can motion a chart to any location on a document. You tin also change the size of the chart for a better fit.
Move a chart
-
To move a chart, drag it to the location that yous desire.
Top of Folio
Resize a chart
To resize a chart, practise ane of the following:
-
Click the chart, and then elevate the sizing handles to the size that you want.
-
On the Format tab, in the Size group, enter the size in the Shape Height and Shape Width box.

For more sizing options, on the Format tab, in the Size group, click the Dialog Box Launcher  . On the Size tab, you lot can select options to size, rotate, or scale the chart.
Elevation of Page
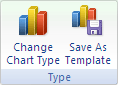
Step seven: Save a chart every bit a template
If yous want to create some other chart like the one that you just created, you tin save the chart every bit a template that you can utilise equally the basis for other like charts.
-
Right-click the chart that y'all want to salvage as a template, and and so click Salvage as Template.
-
In the File name box, blazon a name for the template.
Annotation:A chart template contains nautical chart formatting and stores the colors that are in apply when you save the nautical chart as a template. When y'all employ a chart template to create a chart in some other workbook, the new chart uses the colors of the chart template — non the colors of the document theme that is currently applied to the workbook. To use the certificate theme colors instead of the chart template colors, right-click the nautical chart surface area, and and so click Reset to Match Style on the shortcut menu.
Top of Page
-
Click the chart that you want to salve as a template.
-
On the Blueprint tab, in the Type group, click Save as Template.
-
In the File proper noun box, type a name for the template.
Note:A nautical chart template contains chart formatting and stores the colors that are in utilize when yous save the chart every bit a template. When you apply a chart template to create a nautical chart in another workbook, the new chart uses the colors of the chart template — non the colors of the certificate theme that is currently practical to the workbook. To employ the certificate theme colors instead of the chart template colors, right-click the chart surface area, and then click Reset to Lucifer Style on the shortcut card.
Top of Page
Source: https://support.microsoft.com/en-us/office/present-data-in-a-chart-58516b99-55fc-4f45-ac81-cc6868a18a8a
0 Response to "Should Charts and Graphs Be Uploaded in the Text or at the End"
Post a Comment